How to Sharpen a Knife with the Smith Field Sharpening System

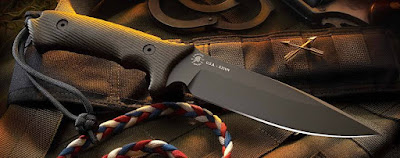
My work knife was damaged so I bought this Smith field sharpening system to repair and sharpen the blade while away from home. This is a demonstration and review of the smith field sharpening system.
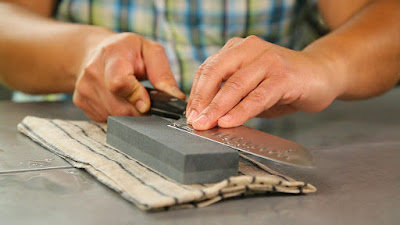
How to repair the damaged edge of a knife and then re profile the cutting edge and finally sharpen it using the Smith Field sharpening system.
I started Knife making as a project to make a personal gift for each of my children. The first three knives that I made with hand files to do the shaping of the bevels. This is a long labor intensive process. I did make a wooden bevel filing jig which helped me keep the bevels at the desired angles.
After make the first three knives I decided that for the rest of the knives I would get an inexpensive grinder to speed the process along. I found a Delta 1″ x 42″ sander on Craigslist for $100.00 and bought it. Using this grinding I was able to shave 18 hours off of the time it was taking me to make a knife.
I used the small belt sander to make the rest of the knives. When I was done I realized that I had really enjoyed learning how to make knives and the work involved in making them. But I was not too interested in spending very long times to make them. So I determined to upgrade my equipment. The cost of purchasing the desired equipment was more than I was willing to spend.
The other choice available was to build it myself. I already had the skills to build it and had several of the key components sitting around the garage unused. I researched for a while to see what level of performance I wanted from my 2″ x 72″ sander build. It needed to have plenty of power for heavy stock removal tasks, I wanted it to have speed so I could build knifes quickly and finally it must be versatile so I could use it to do all of the specific types of grinding that may be required in knife making. It turned out fantastic. I have a series of the sander build on my channel if you care to see the design and build.
Next I felt I needed to improve my skills in the area of knife design and production so I could control the cost of my knives to a point that would be affordable to a larger group of potential customers. This meant that for some of my designs I would use CNC machines to do work that I could not do at a comparable price. In order for this to be possible I would need to learn how to get my ideas into CNC compatible format. To make this happen I started learning CAD with Draft Sight.
It was not nearly as hard as I thought it would be and I kick myself for not learning it much sooner. The CAD use has opened up an entirely new universe of creative options for me as a knife maker. I am not an expert with it by any means but I have been able to use it well enough to come up with some fantastic profiles that can then be economically cut on a CNC laser.
I also outsourced the heat treatment process’s. The steels that I use are often referred to a super steels. They require very specific and sometimes complex conditions for proper heat treatment. The temperature ranges for getting best properties are very narrow. Some of them need to be heated in an oxygen free environment to near 2000 degrees then quenched and tempered to -300 degrees. There is no way I could do all of this satisfactorily or competitively on cost.
The areas that I am able to add value competitively to the knife making process is in the design, and finish of the knife. So this is where I have decided to focus my personal knife making energies. I feel that I have so far accomplished my desired goal of being able to create very high quality knife sharpener original knife designs that are competitively priced.

Comments
Post a Comment